
You may need a screen recorder for your PC for a plethora of reasons, right? Well, iFun Screen Recorder can help with that. So, if you are planning to get your hands on this screen recorder for your Windows 10, then first make sure to go through this actual review article as it will help you get a better understanding of the screen recorder.
Let’s get started and uncover everything you need to know about the iFun Screen Recorder!
iFun Screen Recorder is a screen recording software from IObit. This great software can record anything on your Windows 10 screen without any performance loss. With this screen recorder, you can record your gameplay or create a tutorial in just 3 simple steps. The best thing about the iFun screen recorder is that it is easy to use and free, and it comes with a built-in light video editor.
With high quality and extra special features, you will get the experience of lag-free screen recording even during gaming. This online screen recorder can help you record everything on your screen in HD with high audio quality at the same time. Thanks to the built-in video editor, which can help you make changes to the recorded video without any hassle.
How to record screen on windows 10
If you do not know how to record screen on Windows 10, iFun Screen Recorder will be a great helper to help you record your Windows 10 screen.
This program has recently received some major updates to make it more useful, allowing you to now take screenshots and make memes as well. Here are detailed tips to record your Windows 10 screen by iFun Screen Recorder.
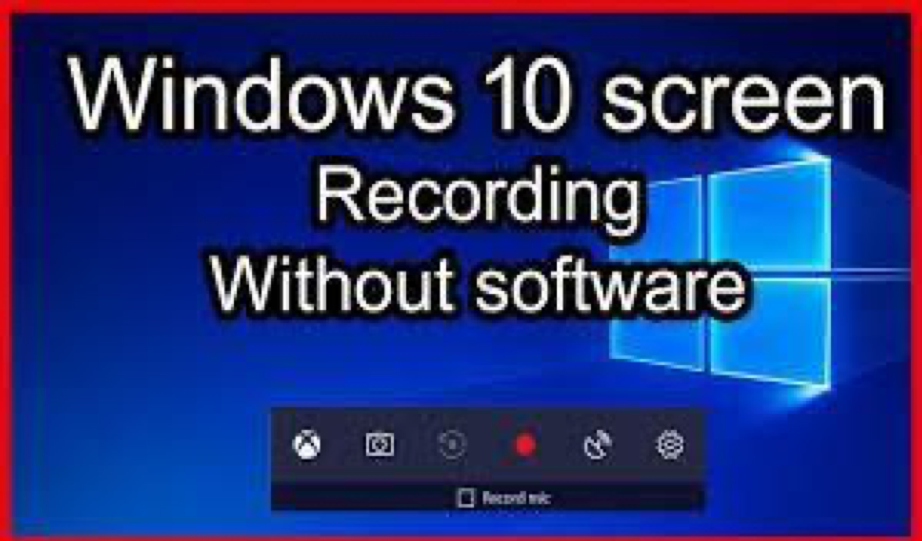
- Open the app you want to record. Unfortunately, the screen recorder tool cannot capture some programs, such as a file manager, or the entire desktop, but it works in regular apps, whether from the Windows Store or the desktop app.
- Press the Windows key + G at the same time to open the game bar dialog.
- “Yes, it’s a game” checkbox to load the game bar. This process is whether you are doing a screen recording of a game or any other type of app.
- Click the Start Recording button (or Win + Alt + R) to capture the video.
- Stop the recording by clicking on the red recording bar which will be in the top right of the program window. (If it disappears on you, press Win + G again to bring the game bar back.)
This much only! You will find your recorded videos, which are MP4 files, under the Videos folder in a subfolder called Capture. You’ll also find them in the Xbox app under the Game DVR menu, where you can trim the video and share it on Xbox Live (if it’s a game).
We hope this helps, and you can also teach someone else how to record screen on Windows 10