Audio problems are common on Windows computers especially when you upgrade it to a newer version. The new version of the operating system may not be compatible with the old audio drivers and other devices. You may encounter error messages like ‘no audio device installed’ or ‘Windows 11 audio device problem’ etc.
There are a few manual methods that you can try before installing the Best Driver Updater software for Windows. Windows inbuilt utilities may also help you fix the Windows 11 audio device not working issue. When nothing works, it is recommended to use a third-party driver updater tool for Windows. Let’s start with the basic troubleshooting for how to fix no audio device install problem.
Check Volume Levels
The step to diagnosing the issue is to check if all the soundbars are up and your device is not on Mute. Level up the volume on speakers, and internal bars to ensure the volume is all set to high and the PC is not on Mute.
Check Sound Settings
There is a small icon at the bottom right that opens up the sound settings. You need to right-click on the volume icon and click on the Open Sound Settings option. Ensure that the volume bars are levelled up and there is no exclamation sign or error reporting.
Check your Speaker/Headphone Connection
It is always advisable to check proper connectivity for wired or wireless setup. Disconnect and reconnect the Bluetooth speakers or re-establish the network/wired connection. Check the power or the battery of the portable device to ensure they are all juiced up.
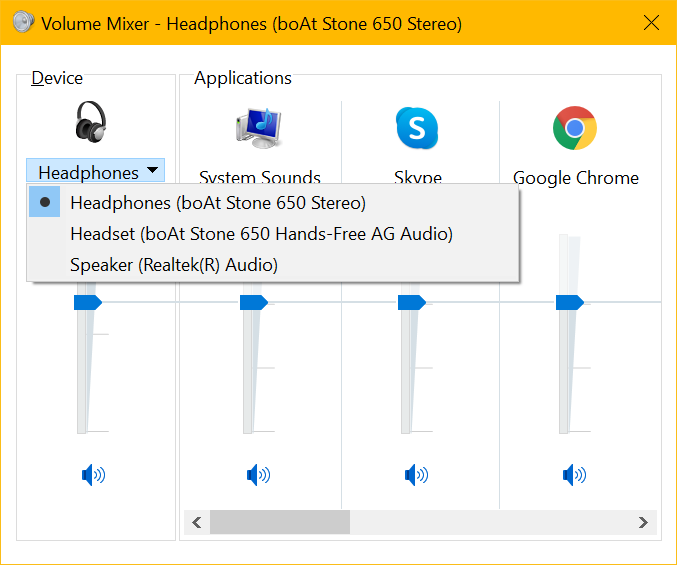
Set Default Speakers
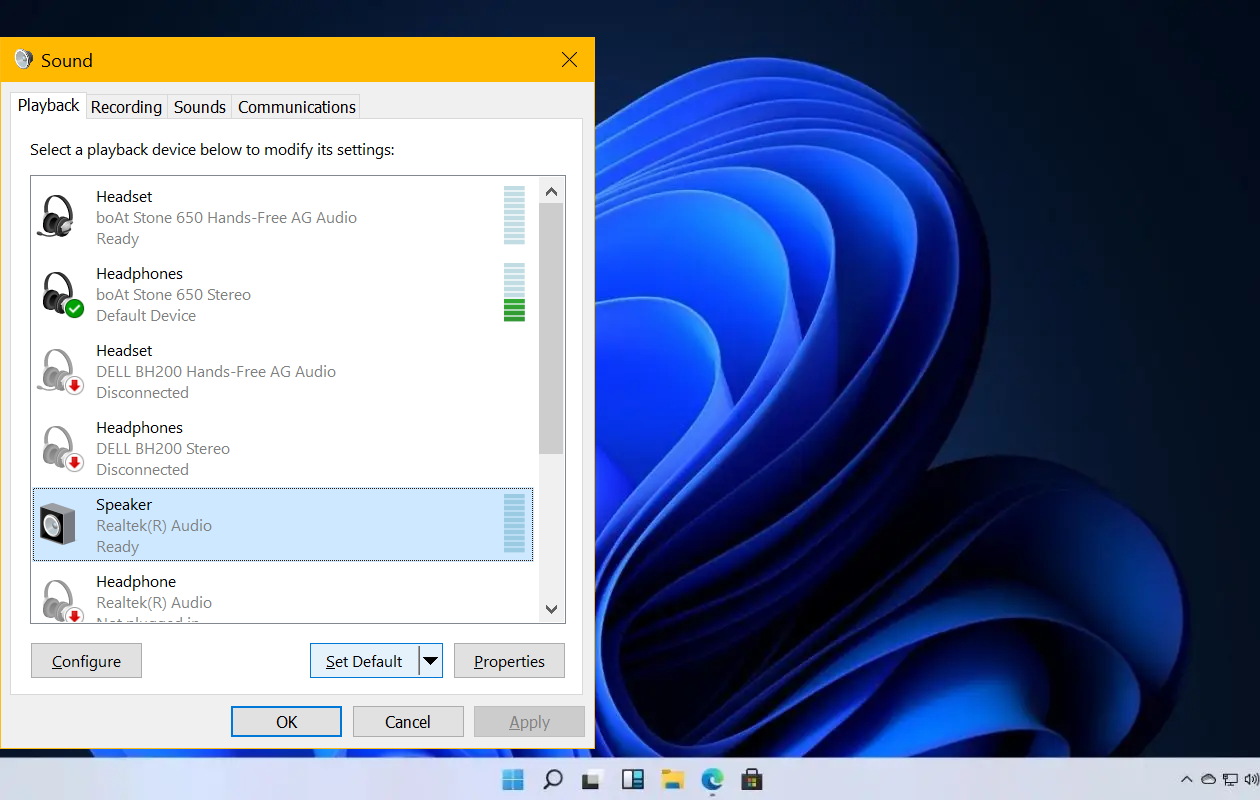
If you have ever configured multiple output devices, there can be a conflict in the default device that we are trying to connect. Right-click on the volume icon at the bottom right and click on the Sound option. On the Playback tab, select the device that you are using and click on the Set Default option. Click on the Apple and Okay buttons to configure the setting.
Check Software/App Settings
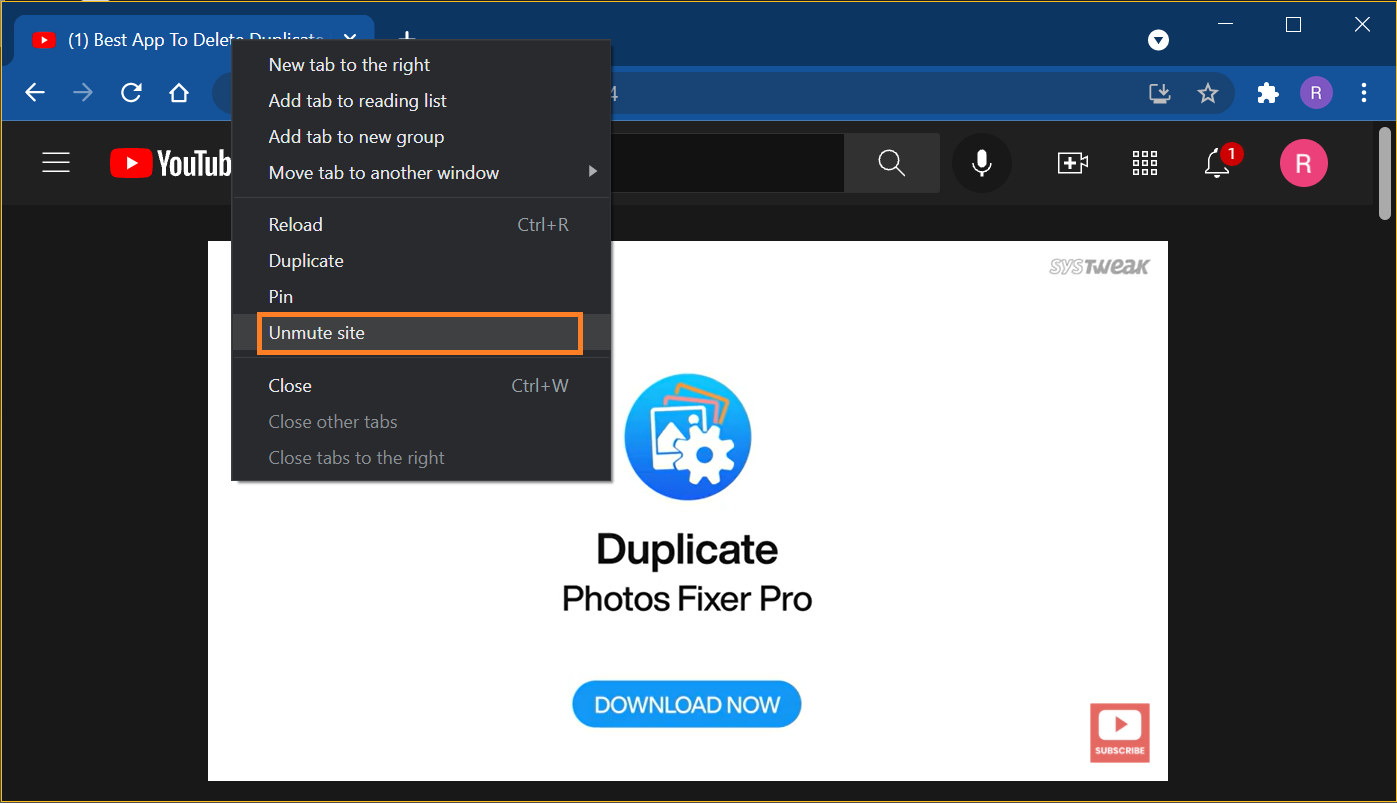
There are times when all the volume settings are perfect however the software, app or browser is set on Mute. In such scenarios, you will never receive errors like no audio device installed or something else. All you need to do is ensure that the browser tab is not set on Mute or the app volume is all set to high.
Check for Windows Updates
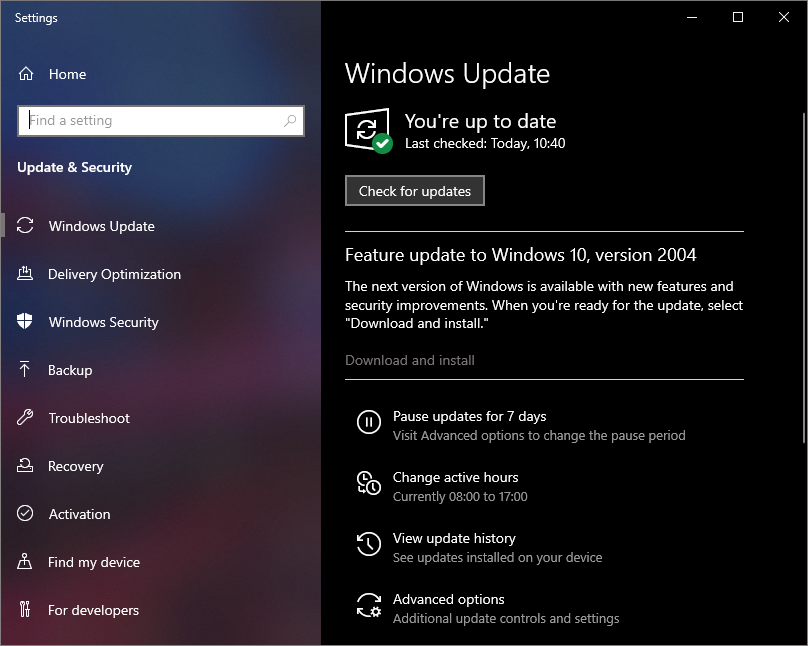
While updating to the latest version of Windows, we must ensure that we install all the latest Windows Updates for the newer version. Windows Update is set to turn ON by default however you can manually check for updates. Press Win + I to get into the Settings window and click on the Update & Security option at the end. Click on Check for Updates button and install all the found updates. If there are critical updates installed, it may ask you to restart the computer. Restart and check if you still face Windows 11 audio device problem.
Run Windows Troubleshooter
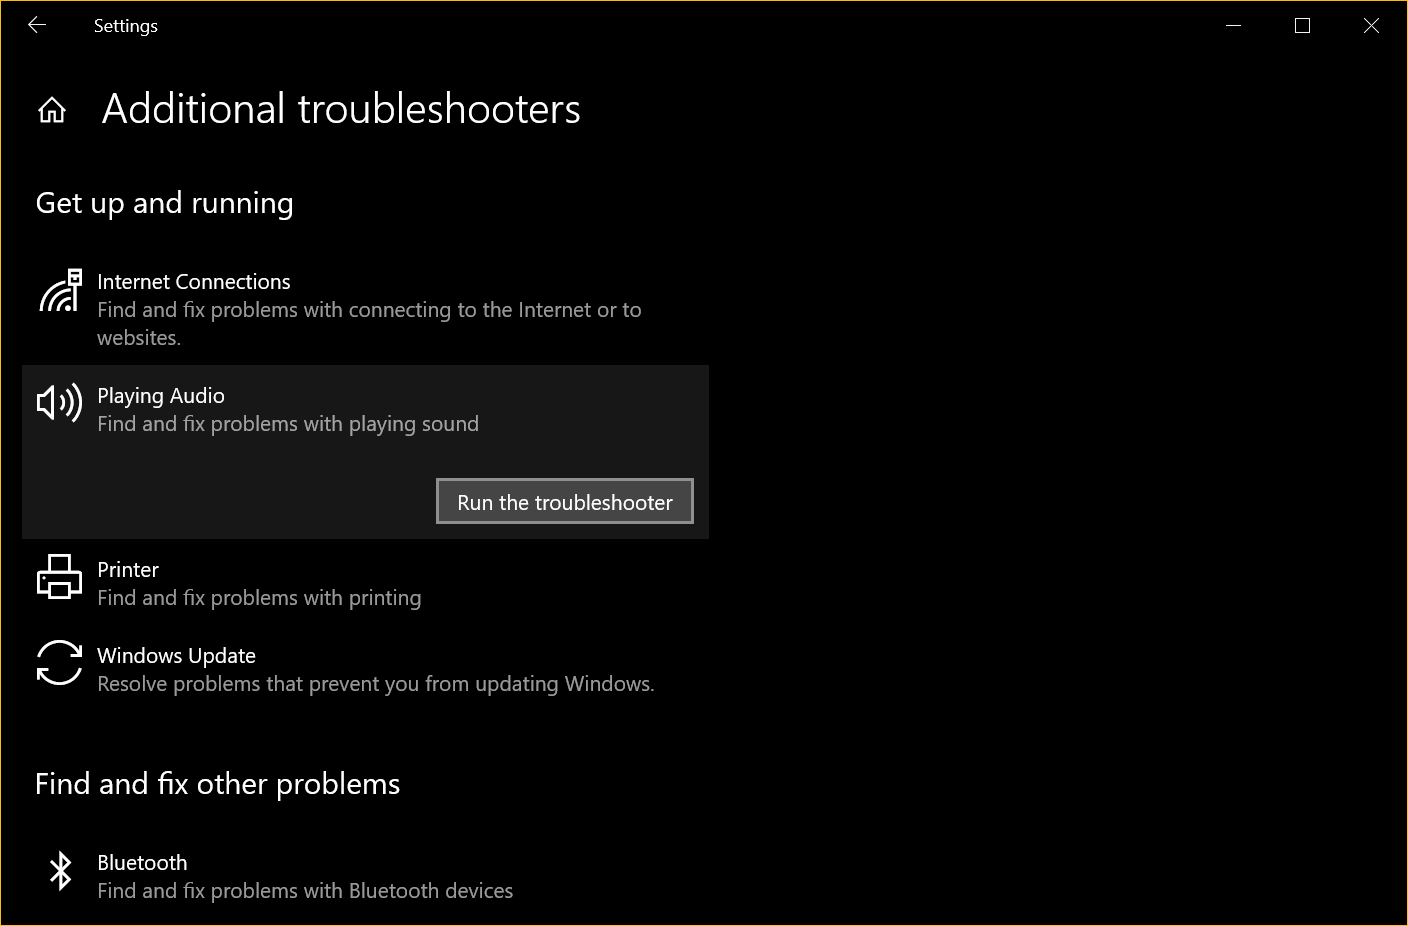
There are times when we are stuck with the issue and can’t diagnose the root cause of the problem. If you are unsure of how to fix the No Audio Output Device Installed problem, it’s time to take help from the Windows Trouble-shooter.
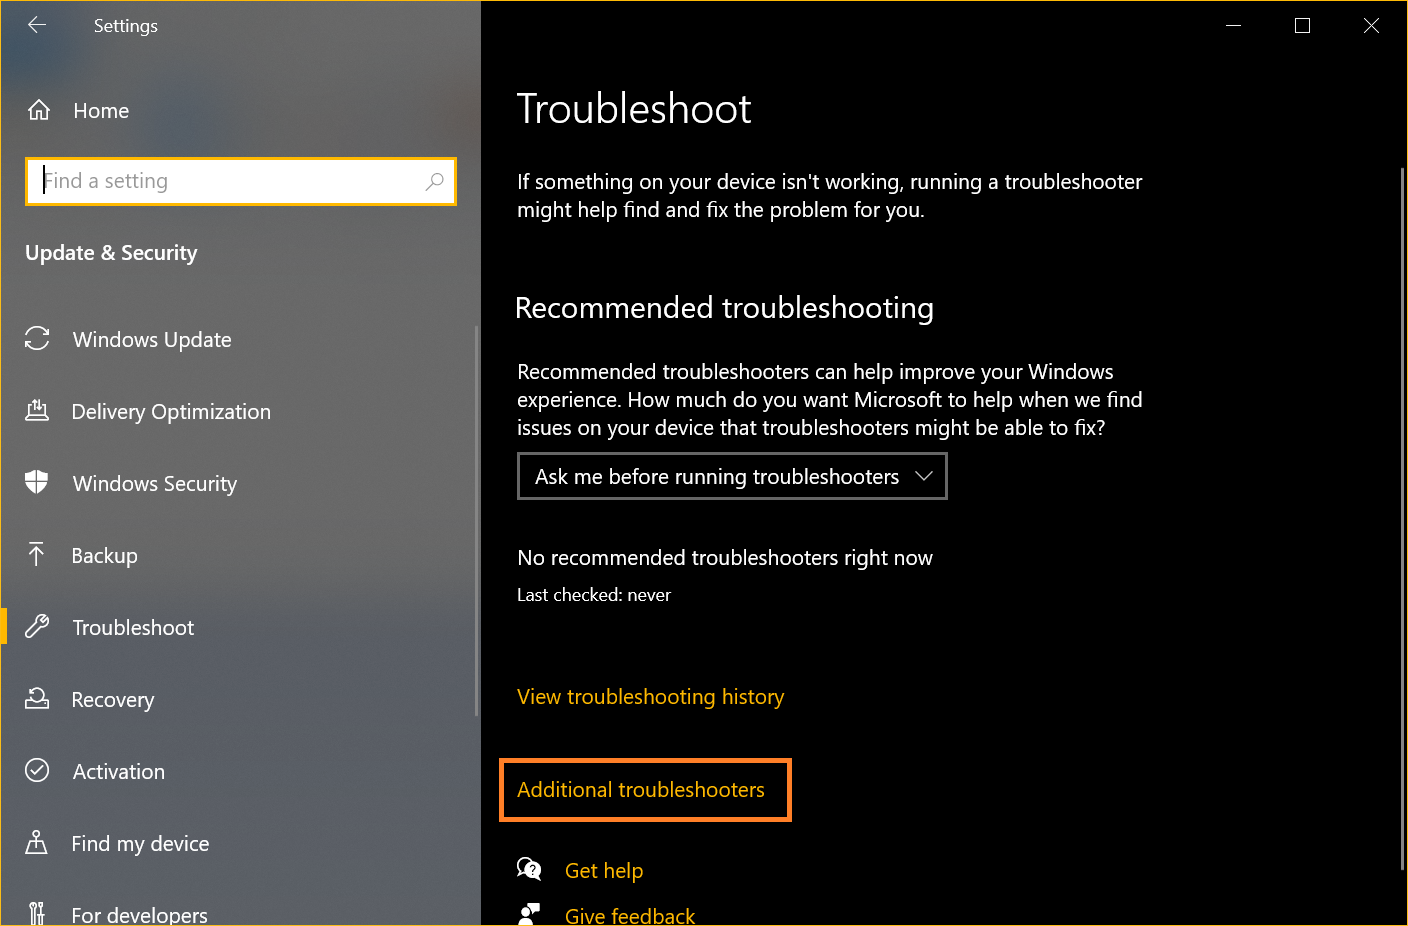
Press Win + I to get into the Settings window and click on the Update & Security option at the end. Click on the Troubleshoot option in the left-hand side panel and click on the Additional Troubleshooting option. Click on Playing Audio under Additional Troubleshooting and click on the Run the Trouble-shooter button. Follow the wizard let it come up with errors codes and solutions.
Restart Windows Audio Service
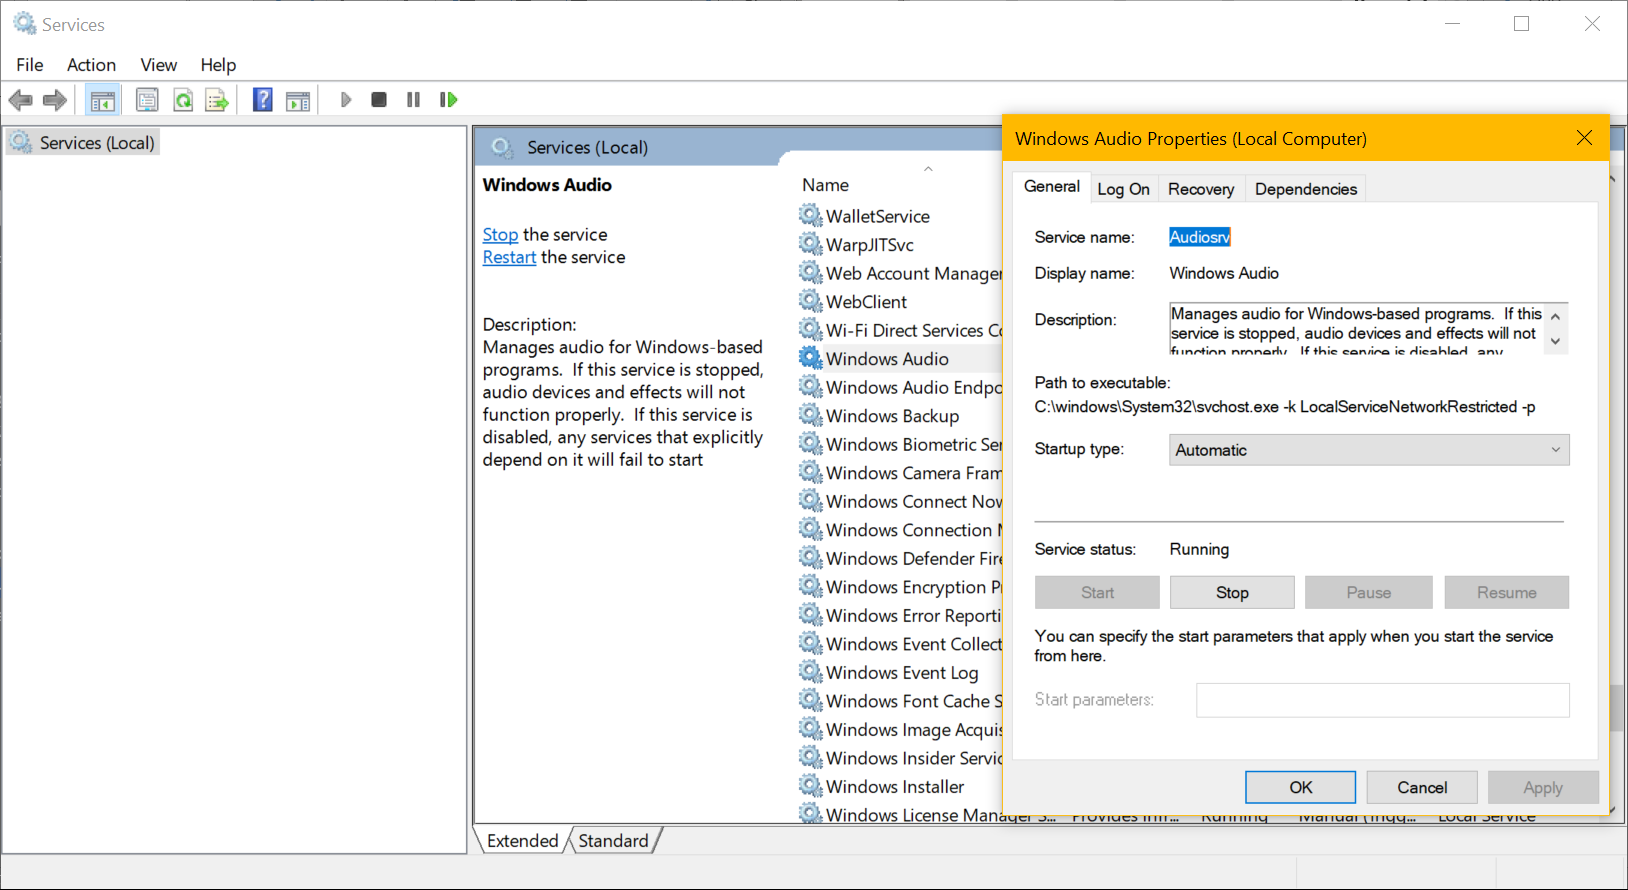
All the Windows services play an important role in managing devices. You can click on the Start button and type Services in the search bar. Click on the Services option to open all the Windows services. Scroll down and look for Windows Audio and double-click on the same. On the properties window, select Startup type as Automatic, and click on the Start button to enable the service. Restart the computer and check if Windows 11 audio device problem is resolved.
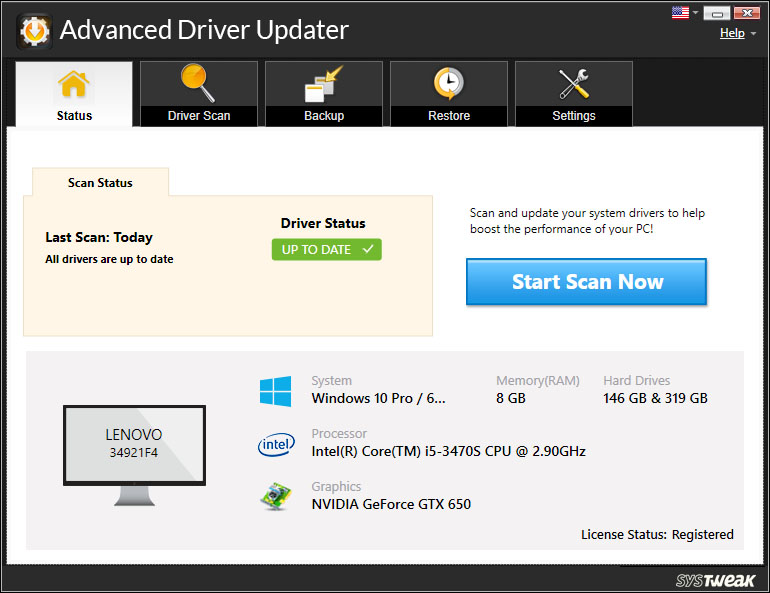
Use Advanced Driver Updater
When nothing works, it’s time to use one of the Best Driver Updater Software for Windows.
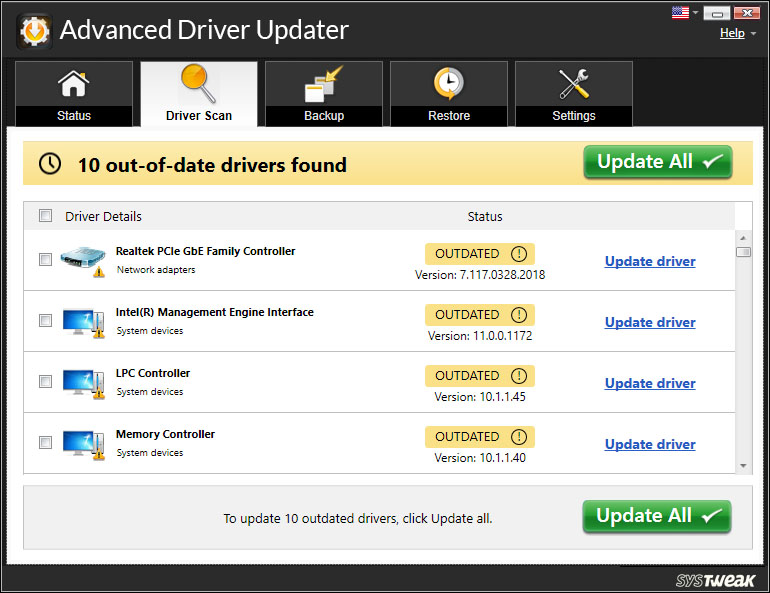
Advanced Driver Updater is ultimate driver updater software that can automatically download and install all the latest, updated and newly released drivers for Windows devices. It is compatible with Windows 11, 10, 8.1, 8, 7, Vista, and XP for both 32-bit and 64-bit versions. This automated utility can easily download and install the latest device drivers. It is an automated solution to replace corrupt, outdated, or obsolete device drivers and fix ‘Windows 11 audio devices not working’ issues.
Advanced Driver Updater has one of the greatest libraries that can download and store all the latest drivers compatible with devices that are not recognized by Windows Libraries. It can automatically update drivers for Monitors, Display adapters, Processors, Network adapters, Audio Cards, Video Cards, Keyboard, Mouse, Wi-Fi, Bluetooth, Disk drives, Optical disks, Scanners, Printers, USB Ports and more. You can follow this link to explore How it Works!
Summing Up
No audio device installed is a major issue as, without audio, you can listen to anything that’s on your screen. There are a lot of inbuilt solutions to Windows 11 audio device problems however you may not find a perfect fix. If you are unsure how to fix no audio device install problem, you can always rely on Advanced Driver Updater. It is an automated solution to fix Windows 11 audio device not working problem. Keep all the driver-related issues sorted with Advanced Driver Updater!