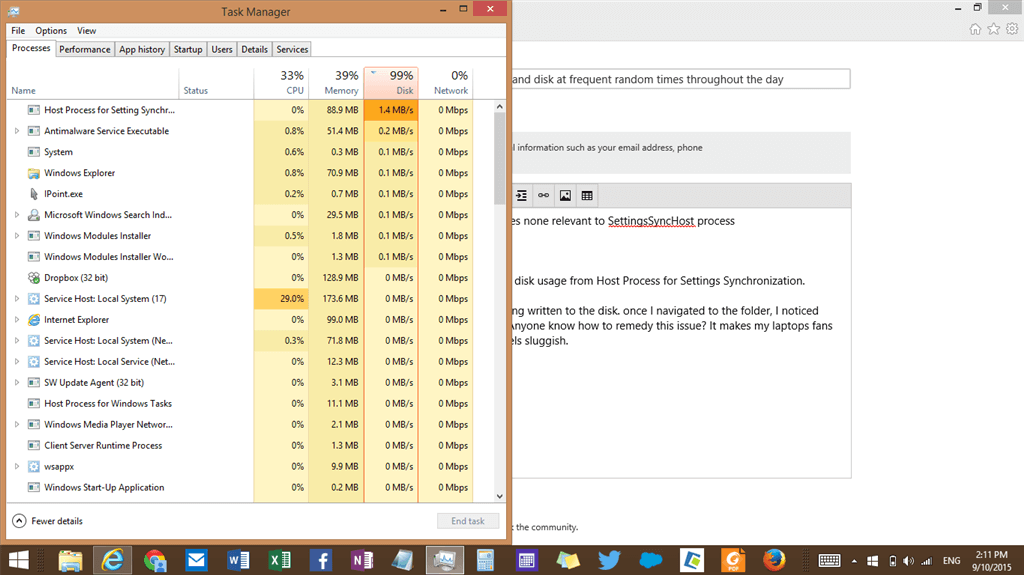
The host process for setting synchronisation is also known as SettingSyncHost.exe. The process involves syncing of all the system settings with other computers of yours. The effect of syncing is that when changes are made in one PC, the effects thereof are seen in other PCs also or any other device that is connected to your computer. Various things can be synced together such as wallpaper, mail app services, one drive, and other such applications.
Now, there exists various issues and sometime people do not even know to how fix the host process for setting synchronisation with high CPU usage error. For this, you need to follow certain steps and actually they are very easy to follow-
Method 1- Update Windows
Sometimes, when the windows is not updated, there germinates various problems. So, it is important to keep the windows updated so that the operating system functions in the best possible manner. Now, to update your windows, you need to do the following-
- Press the Windows key and I key simultaneously to open the settings and then click update and security.
- Choose Windows Update and then click Check for updates in the right panel.
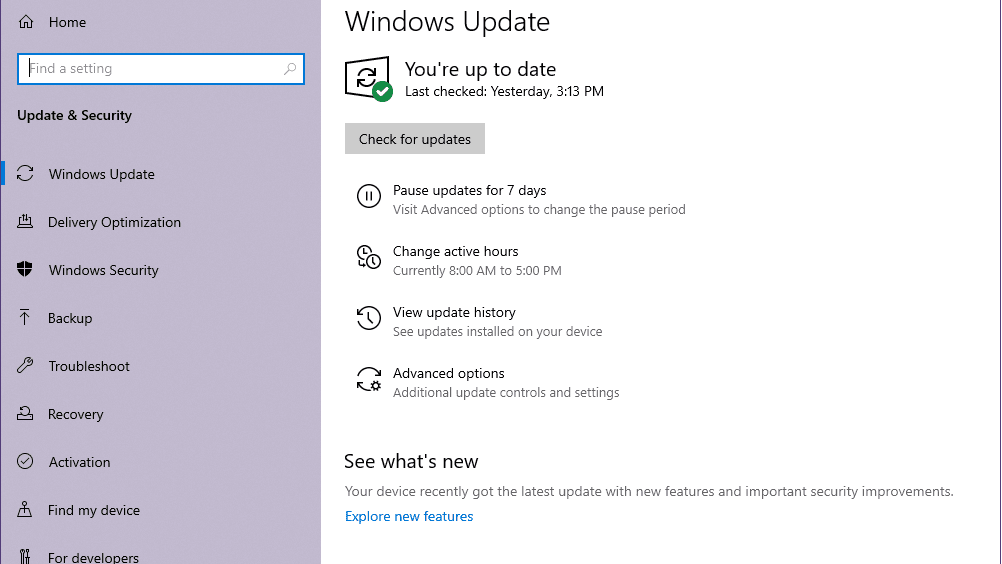
- If there are any updates, the windows will automatically starts to download them. After the updates are downloaded, you need to restart your computer and perform the installation process.
Now, after installing the updates, you need to check if the Host process for setting synchronisation still causing issues or not like consuming high PC.
Method 2- Add ownership for a registry key
Sometimes, the reason for high consummation for CPU is that the setting of the Registry has changed or altered a little. Thus, the solution for this is to add ownership to the registry and resolve the issue. To do this, you need to follow the steps given below-
- Press the Window key + R key at the same time to open the Run
- Type regedit in the box and then click OK to open the Registry Editor
- Next you need to go to the path:
HKEY_CURRENT_USER\Software\Microsoft\InputPersonalization\TrainedDataStore
- Right-click TrainedDataStoreto choose Permissions….
- Check Full Controlunder the Allow Then click Apply and OK to save changes.
- Last, you need to restart your windows, and see if the issue still persists or not.
Method 3- Running a Power Shell Script (only for advanced users)
If the solutions mentioned above do not function effectively, then you need to do the third step as given below. We can write a Power Shell Script to tackle with the situation. To do this, you need to add your credentials in the computer to register your job. So, follow the steps given below to do the same-
- Press Windows + S, type “PowerShell” in the dialogue box, right-click on the application and select “Run as Administrator”.
- Once in elevated status, execute the following code given below:
Once, you do this, you need to add your credentials so that you can register your job. After adding your credentials, you can check the process “Settingsynchost” will not come and the issue is resolved without any problem or efforts.
- Once you have registered for the job, and just want to kill it, then do the following command as follows-
Get-ScheduledJob | ? Name -eq “Kill SettingSyncHost” | Unregister-ScheduledJob
- Again, restart you computer and see if the issue is gone or not.
Conclusion
Thus, you can easily resolve the issue with the abovementioned steps. But you have to keep in mind that the last step is for the advanced users only. Nonetheless, the methods stated above can help you in eliminating the issue better.
Feel free to contact us if you have any queries related to this or you can comment down below.